Sunday, April 18, 2010

Installing the Sides, Tail Block, and Linings


Now it's time to make this thing more 3-dimensional by adding sides. 
After the side is bent, it is clamped into a mold to hold its shape while making the measurements to determine where the ends are trimmed for the final fit. 


The angled line (below) allows the side to fit into the slot that in the neck.


We also need a tail block to add reinforcement to the bottom of the guitar where the two sides meet.  I had a piece of mahogany sitting around that will be good for this.  Just needs to be sawn up...


After a lot of sawing, I got six tail blocks out of that hunk of wood.


Now everything is glued and clamped into place.


A lining has to be added to connect the sides to the top.  Here, I'm using a traditional Spanish method of gluing individual triangle-shaped pieces (called tentallones, or dentallones) one at a time using hot hide glue. I'm beginning where the two cross bars meet the sides, and working around the perimeter.


I meant to take more photos along the way, but got too engrossed.  The photo below shows all of the lining installed - the dentallones lining the top, and the lining that the back of the guitar will be glued to.  A tricky bit here: since the back is radiused, the linings that the back will attach to have to be sloped to the same radius for a proper fit.  That has already been done here, and our attention now shifts to preparing the back.


Next Post:  The Back

Sunday, April 11, 2010

The Sides of the Guitar

The parts of the guitar are known by various names.  In the U.S. we typically refer to the wood between the top and back as 'sides'.  In the U.K. they are called 'ribs', which makes just as much sense.
The tricky part here (there's always a tricky part) is to bend them to the proper shape without breaking them.  They have to be thin enough to bend, but not so thin that they are weak and unstable.

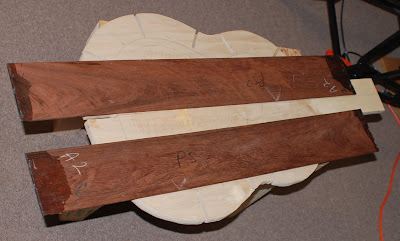
These are the sides as recieved from the wood supplier.  The need to be thinned a lot, but this has to be done carefully so the wood is not damaged in the process (the power planer is not an option).


After thinning... 
In this case these sides had enough extra width to allow sawing some thin strips to use for the binding (you'll see that used much later).  The wood, as recieved, is not always wide enough to provide bindings but in this case I was lucky.


Some final thinning and smothing before bending...


Since I had the bindings cut, I went ahead and glued on some veneer strips for decoration.  Here, the veneer is being scraped level with the binding.


back to the sides...  there are two approaches to go about getting them bent into the desired shape: freehand bending using a 'bending iron' (a sort of circular or oblong shaped metal pipe with a heat source), or a bending jig - bending the wood over a form.  Here, I'm using a bending jig with a heat blanket to supply the heat.


Once clamped into the form, the side is allowed to cool, and remains in the form for several hours to prevent springback of the bent wood.


Next Post:
Fitting and Attaching the Sides,
Tail Block, and Linings

Saturday, April 10, 2010

Bracing The Soundboard


The 'bracing' reinforces the soundboard so it can withstand the tension from the pull of the strings.  It also influences the sound of the guitar by controlling how the soundboard vibrates in response to the energy from the strings.  Many different bracing patterns are used in an attempt to shape the sound.  The bracing I'm using here is very traditional, going back to Torres, and modified slightly by Hauser.
The photo below shows the braces in position, but not yet glued.  (A lot of work went into shaping these little 'sticks' from a wedge of spruce!)


The sounboard is clamped to the solera (workboard) and the hide glue is being heated.  One function of the solera is to achieve the doming of the soundboard in the lower bout.  The solera is dished out in this area, and when the fan braces are glued onto the soundboard they are pressed into the solera, forming the dome.


Here the braces have been glued and clamped, forcing the soundboard into the solera.  You can see bits of the hide glue which was squeezed out when clamped.  Hide glue cleans up easily because when it cools a bit, and before it dries, it peels right off.


All of the braces cannot be glued on at once.  After gluing, the braces are carved to the proper shape, then other braces are glued on and carved.


more brace shaping...

more brace gluing...


Finally, all of the braces are glued on and shaped, and the soundboard is completed.


Next, the soundboard is glued to the neck.  But first a shelf has to be created at the end of the neck so the soundboard will be level with the neck.


After some very careful measuring to insure proper allingment, the neck is glued to the top.
It's getting closer to being a guitar!


Next post: The Sides