Thursday, March 25, 2010

The Soundboard


Now the crucial part.  This is the part that makes or breaks the guitar:

The Soundboard
(usually referred to as the 'top' in the USA)

There are many variables to be considered (thickness, doming, bracing...), and depending on how this is done, the guitar could have the voice of an angel (consistently achieved only by great guitar makers) or sound like an inexpensive ukelele.

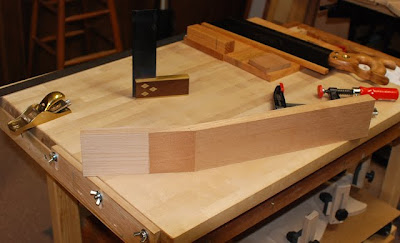
When purchased from the supplier (there are wood dealers that specialize in cutting wood specifically for musical instrument builders), the top comes as two pieces (trees are not wide enough for a one-piece top).  This is a set of Italian alpine spruce (picea abies) that I purchased from a wood harvester/dealer in Italy.


As received, the wood is usually 4mm to 6mm thick.  The soundboard typically ends up in the range of 2mm to 2.5mm thick.


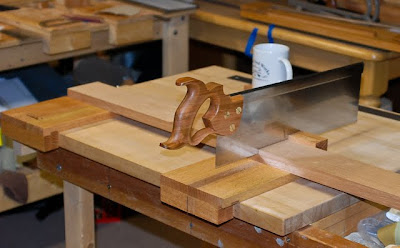
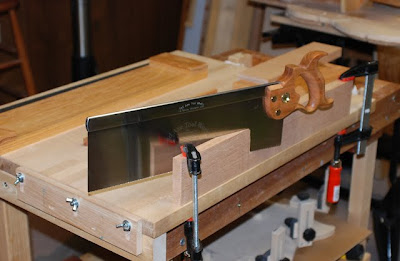
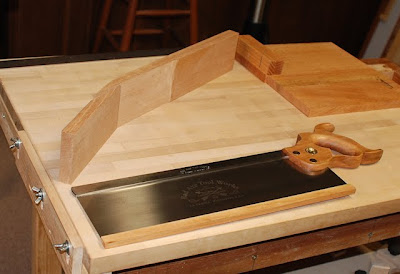
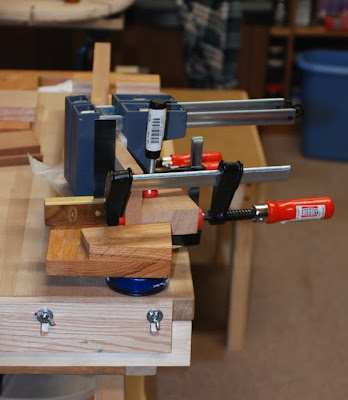
The first job is to glue the two pieces together.  The edges that will be glued (the center seam of the top) need to match perfectly so there is no gap in the seam.


The two halves are glued together.  I use a 'plate joining jig' purchased from Luthier's Mercantile, Inc.  It makes the job almost foolproof.  The key to success is to apply downward pressure while pressing the two halves together.


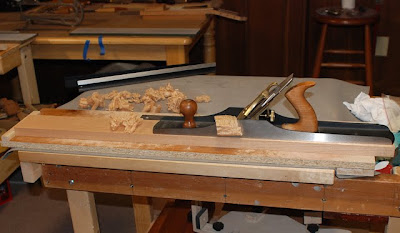
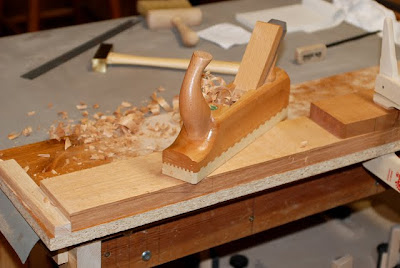
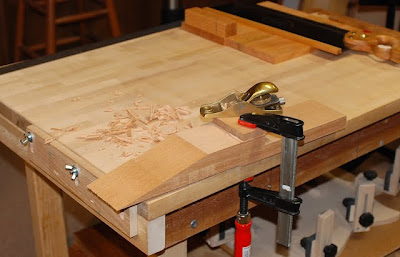
Now the joined top needs to be thinned considerably.  To avoid tearing the wood, I use a toothed blade in the plane.  Removing 2mm - 3mm of wood is a lot of work.


With the top thinned (at least in the ball park - fine tuning will come later) the shape of the guitar is cut out and it's time to install the rosette.  A channel around the sound hole must be removed for the rosette to fit into.


Here are two tops with rosettes installed.


Now the sound hole is cut out.  Don't worry - the gap at the top of the rosette will be covered by the fingerboard.


Next post:  Bracing the top.


Carving the Heel & Foot


After finishing work on the guitar's head, it's time to 
work on the heel/foot structure.
The 'foot' is inside the guitar, and the 'heel' is on the outside.
There is a slot between the heel and foot that defines where the
body joins the neck.  The block that form this structure is made by
gluing up the leftover chunk from the length of the board used
to make the neck.  Shown below, the lines indicate where the slot
will be sawn that defines the connection between body and neck.


The next picture shows the slot (sawing it is a tricky bit).


Another view of the slot.  The sides of the guitar will fit into this slot.


A lot of wood is now removed as the heel is shaped. 


Both sides have been carved and leveled.


The foot is narrowed by sawing the sides at an angle.


Final shaping of the foot.

Carving the heel...


Almost there...


Finished heel, foot and slot.


Different takes on the heel/foot.  The lower is Hauser style, upper is after Miguel Rodriguez, Jr.


A couple more photos comparing Hauser and Rodriguez styles...


Now we can put the neck aside and begin working on 
the 'top' (soundboard), which is the subject of the next post.


Next post: The Soundboard: the Soul of the Guitar!


Sunday, March 14, 2010

Classical Guitar Heads


Classical Guitar Heads

Classical guitars are very traditional in appearance, and relatively subdued compared to some steel string guitars (which are frequently adorned with decorative purfling and fancy inlays on the head and fingerboard...).  Still, there a a couple areas where the classical maker can exhibit some individuality: the rosette and the crown - the shape of the top of the head.  

The crown used by Antonio de Torres Jurado (1817-1892), sometimes referred to as the 'cloud' design due to its three semi-circles, is the granddaddy of them all, and still used today by many guitar makers - partly as an homage to Torres, partly because of its' timeless beauty.  A slight variation of this design was used by the great German guitar maker Herman Hauser I (1882-1952), insuring it's relevance and popularity with future generations of guitar makers.

The two guitar heads at the bottom of this photo are after Hauser.  Hauser (unlike Torres and most others) added a decorative center strip of veneer strips.


...and from behind


Of course, not all guitar makers copied this design.  There are many interesting headstock designs (some simple, some elaborate), and many guitars can be identified by the maker's crown design.  My own design is intended to have a late 19th c. / early 20th c. Spanish look without overtly copying anything already in existence: not so easy, it turns out!


another view...


It may evolve over time, but right now I'm pretty happy with it.

Next post: the heel and foot!


Saturday, March 13, 2010

Adding a Face to the Head


The face (front of the guitar head) needs to have an attractive
piece of wood cover the glue seam.  Usually, such a piece
can be recovered from the cutout of the 'back' wood.
Here, two pieces obtained from the perimeter of the back are glued
together with some decorative veneer strips in the middle.


The front edge of this face needs to be perpendicular to 
the centerline, and 90 deg. to the 
fingerboard (where it will support the 'nut').


Then, it's ready to glue onto the head...


Here it is with the head outline drawn on.  The toothpicks 
(little dowels) on the corners are used to keep the 
faceplate in position while clamping.


Saw around the outline...


I use delicate hand tools to carve out the 'crest' at the top.


Next post: Head Designs (Crests)


Beginng A Guitar


As with any woodworking project, it begins with a board.
The board is made 'true'; that is, flat, and the sides 90 degrees to the face.


A scrub plane is used to thin the board.


The excess length is removed - it will be used later.


Now it starts to become a guitar - the 'head' is sawed
off at the proper angle...


And this is how it fits...


The sawn faces need to be cleaned-up for a perfect fit.


And it is time to glue the 'head' onto the 'neck'.


At this point, it's a guitar neck & and head!


Next post: The head gets a face!

Tuesday, March 9, 2010